To ensure that you can easily create and categorize your content with StoryDriver and then distribute it via the desired channels, you should first configure your StoryDriver as an administrator. This includes, for example, creating content types, selecting the desired channels and distributing rights to additional users.
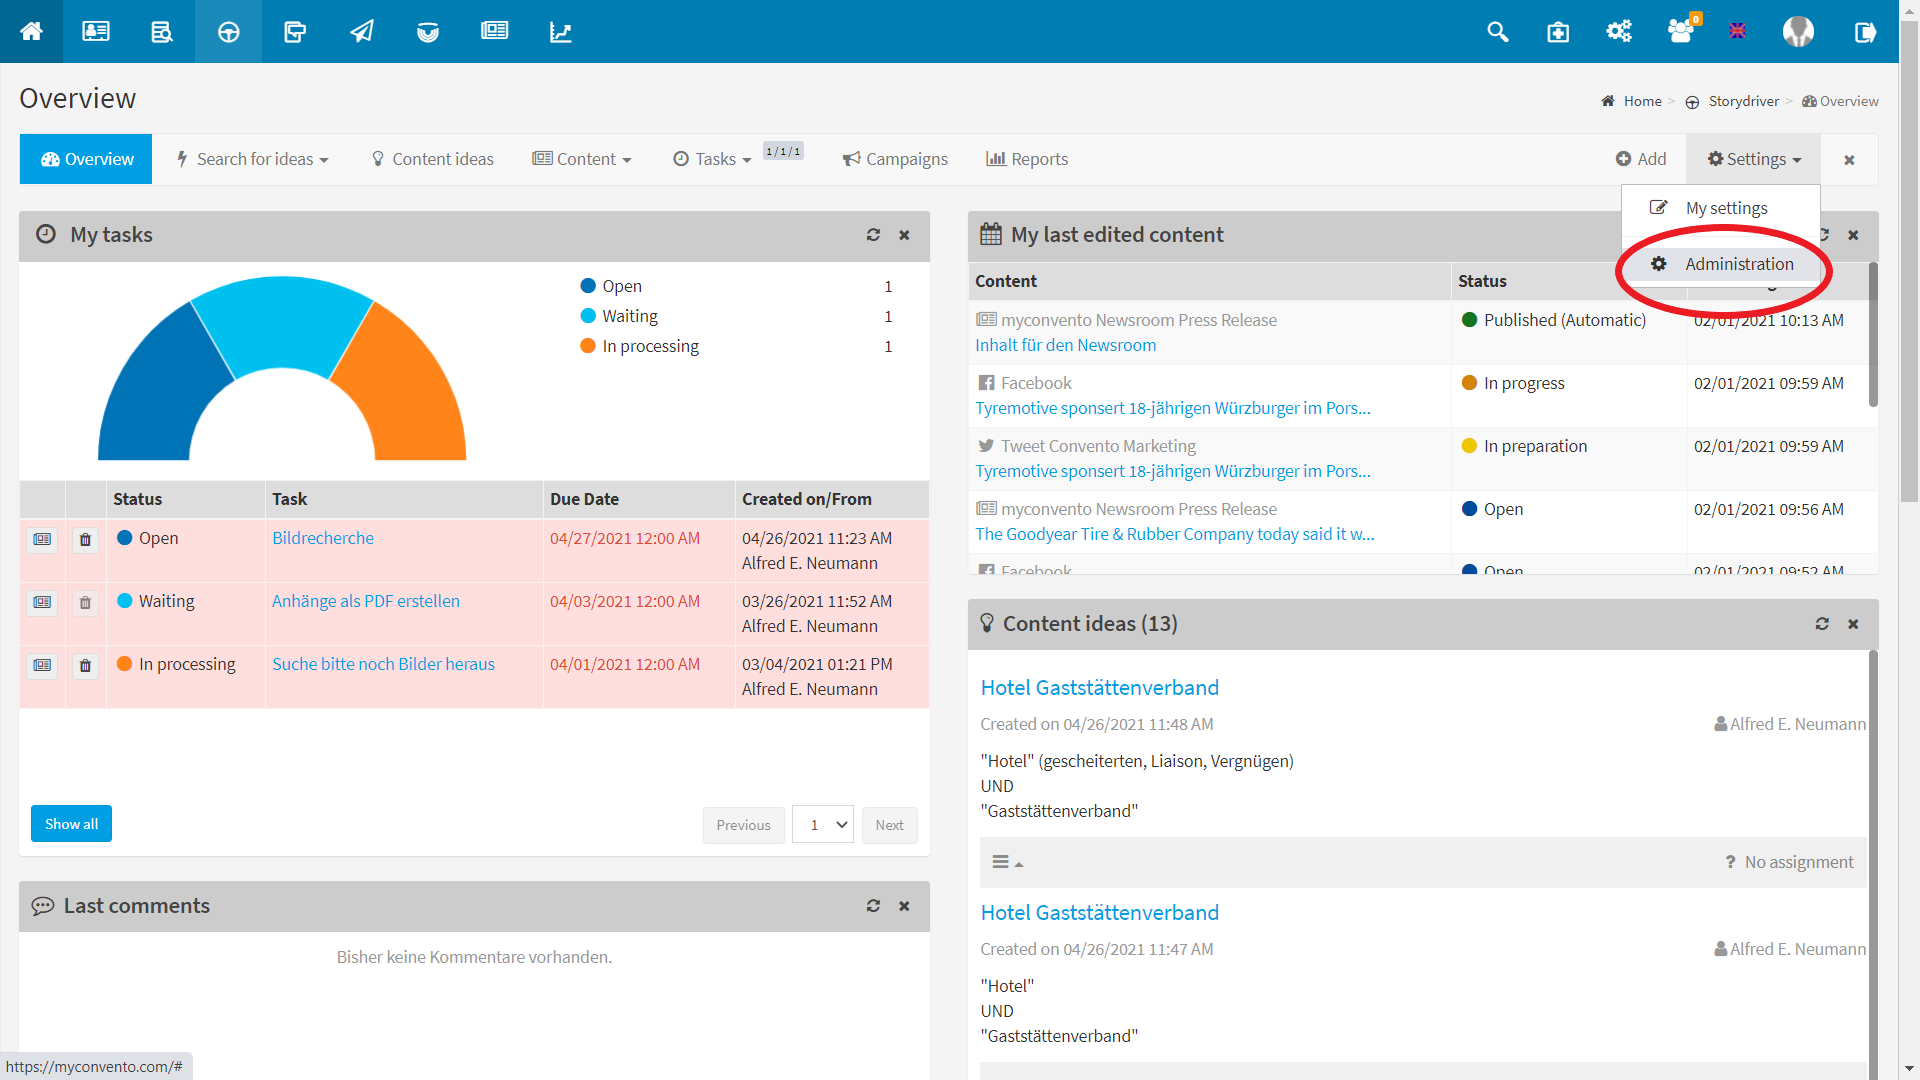
Inthe StoryDriver Overview, click “Settings” in the upper right corner and then “Administration“.
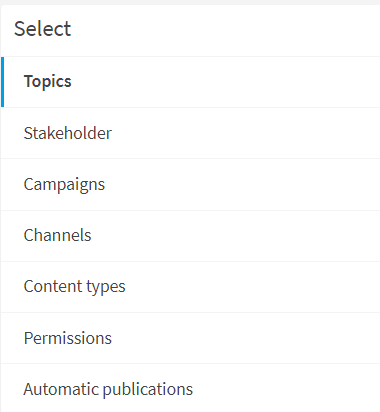
There you will find the following entries/sections/modules.
channelsTopics: You can assign your content to individual topics or topic categories. Create a new topic with the “green plus” in the upper right-hand corner. You can edit an existing topic with the “pencil icon”, and assign “Parent topic”.
Stakeholder: Stakeholders represent your contact persons. Stakeholders can be assigned to topics as well as content. Analogous to topics, you can add a new stakeholder with the “green plus” or edit an existing one with the pencil icon.
Campaigns: Campaigns are used to organize and structure your workflows. Campaigns unify multiple content-types for predefined timeframe and measure the overall progress. As with the previous items, you create a new campaign with the “green plus” or edit an existing one with the “pencil” icon.
Channels: This is where you determine the channels you want to deliver to. If you add a channel via the “green plus” at the top right corner, you can choose from predefined formats under “Channel format”. Automatic publishing of content is only possible for marked channel formats. Activate/deactivate the channel or change its name, format, owner and release options via the “pencil icon”.
Content types: To make it easier to populate your channels with their intended content, set content types. As usual, you can add new content types via the “green plus” in the top right corner and either create a type yourself or select a content type prefabricated by StoryDriver via the “Apply system content types” tab.
Permissions: Here, as the administrator, you decide which user should be appointed as the “Administrator” or who should have access to the “Reports”. All you have to do is check the box in the respective column for the desired user.
Automatic publications: Here you get an overview of all posts that have been published automatically, with the exact time, content-title, channel, status and the respective link to the published post.
My settings: How to be reached by what is really important for you
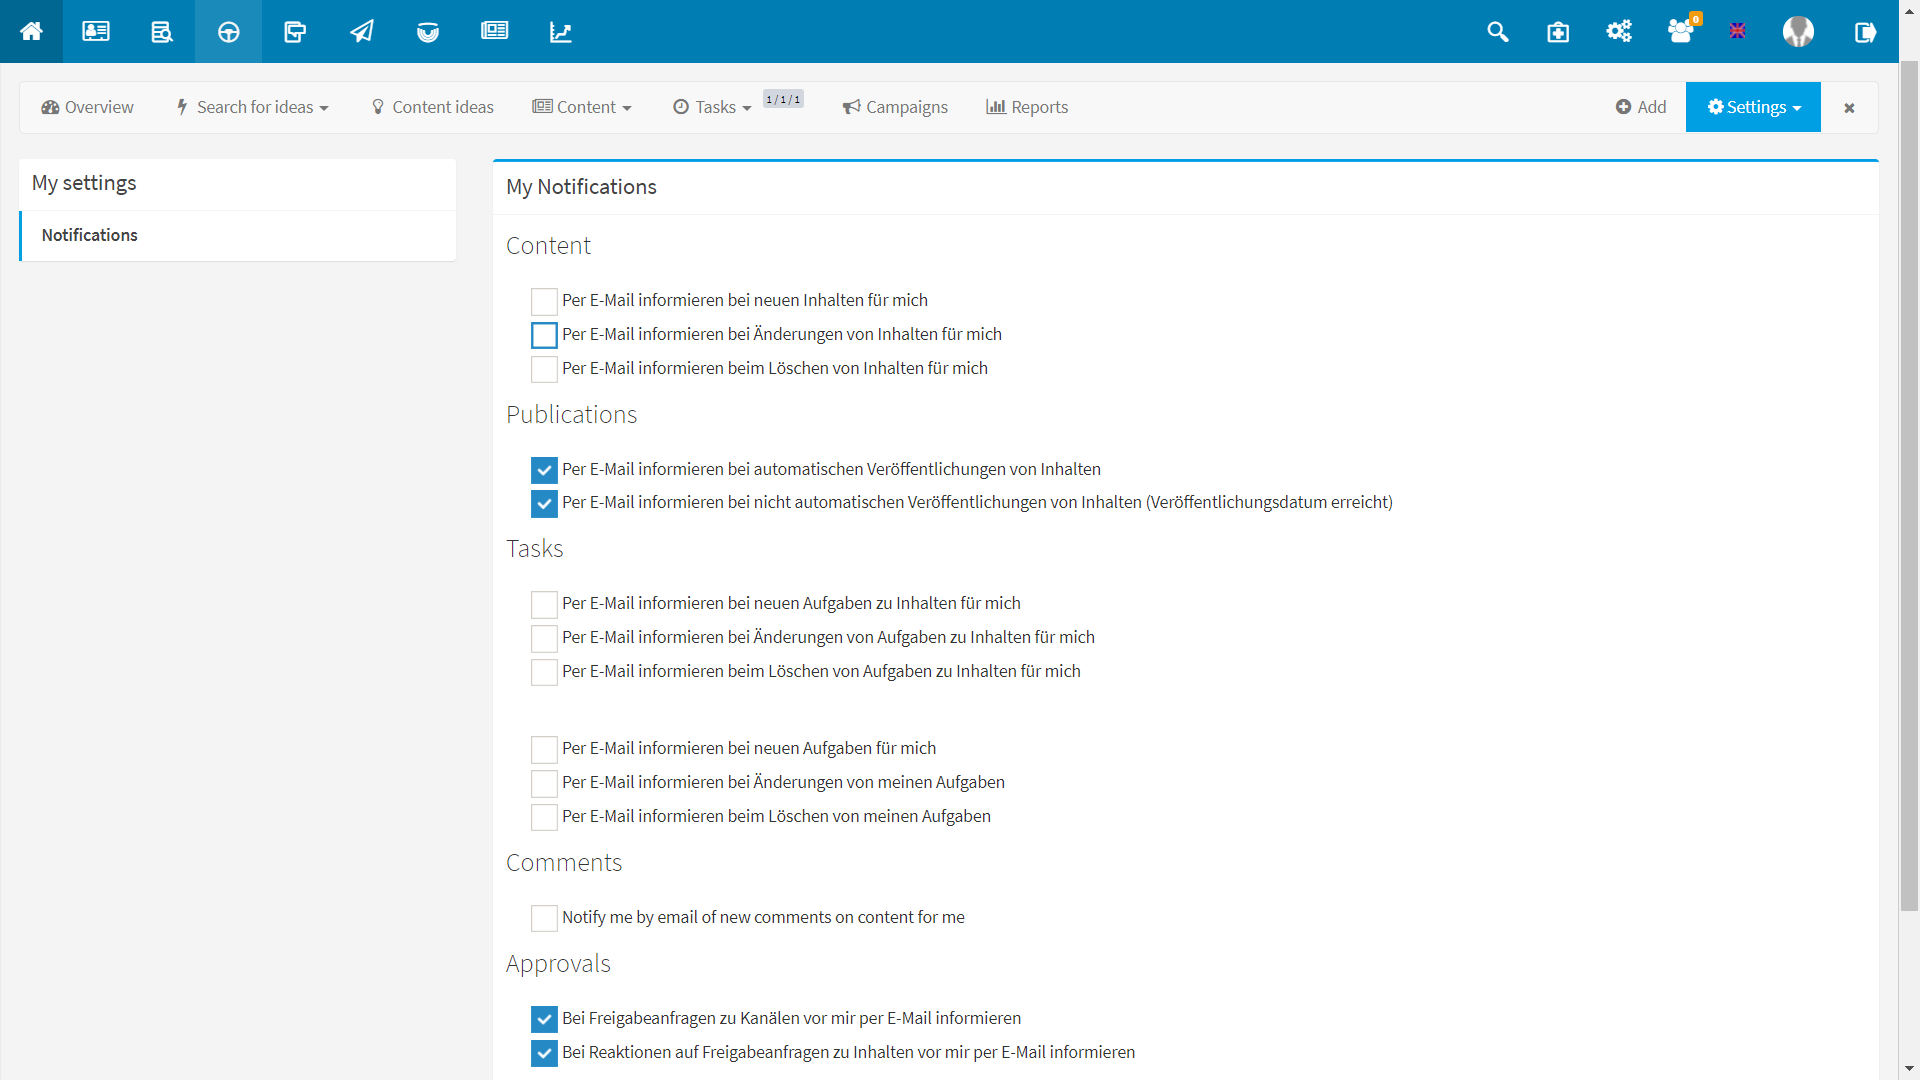
In order to make your team work as agile as possible with StoryDriver, each user must be sufficiently informed about the work processes. Therefore, each user can specify under “My Settings” for individual processes whether a notification is desired for a new activity.
These processes include: Content, Publishing, Tasks, Comments and Approvals.
From the StoryDriver home page, click “Settings” in the upper right corner and then click “My Settings“.
Now you will see an overview of the following areas, where you can set for which actions you want to be notified by email by placing a check mark:
Contents: Decide if you want to be notified when you make changes, delete or create new content that is assigned to you.
Publications: Choose whether you generally want to be notified when content is published automatically or not.
Tasks: Select whether you want to be notified when changes are made to, deletions are made from, or new tasks are created on content that is assigned to you.
Comments: Decide if you want to receive notifications about comments on your content.
Shares: Determine if you want to be notified of share requests on your channels or response to share requests on your content.


